Google
 
Showing posts with label knit. Show all posts

11 December 2010

The Bothered Owl Christmas Yarn Party

Last weekend Sophie of Twist Yarns got a late invite to The Bothered Owl Christmas Yarn Party and wanted some help with her stand, so Monday evening after work I headed into London to give her some support.

It was a fun event with several Indie dyers and a selection of other knit related stalls - oh and lovely mince pies and nibbles.

Twist Yarns were set up just as you came in through the door, and next to Fyberspates - (what temptation). In fact it was a room full of temptation (and I didn't spend a penny!) with luscious yarns in every hue and combination of hues - there was silk, alpaca, merino, bamboo, angora and more - dyed as semi-solids, random dyed, hand painted, kettle dyed, naturally dyed and probably some other methods as well.

There was a lovely hubbub around the room with people chatting, and eating, and buying soft, colourful, wonderful yarns and fun knitty cards and patterns and stitch markers.

29 November 2010

WOOLLY WEEKEND


Last weekend (19th/20thNov) was a good woolly weekend - on Friday evening a new experience - I'd been invited to a Yarn Party held by one of the knitters in the 'Stitch in Bishop's Stortford' knit group. I was one of the first to arrive - well I was very excited by it all - I'd been saving my pennies and was really looking forward to a night out with knitters and loads of wool. I wasn't disappointed - when I arrived there was yarn everywhere - in soft, colourful, squishy piles. A heap of knitted & crocheted samples on the table, a bag of zauerballs here, a basket of Natural Dye Studio there .....sigh

The lady running it all was Sophie of Twist Yarns - she entertained us (it wasn't very difficult) with talk of yarn and then showed us all how to do Tunisian (afghan) crochet and then let us loose on the bags......sigh

I bought 3 zauerballs and a crazy zauerball, a NDS precious and angel, and a skein of Louisa Harding Grace.


The photo below is what one of the zauerballs and the crazy zaurball look like now ;-) nearly finished - one row left plus blocking - look for the finished version soon on Ravelry. it's called seraphina and is a free pattern by grumperina - there are a few hiccoughs in the pattern but once you get the hang of it - it's really straight forward.


Then Saturday

I went to a workshop at the Middle Essex Guild of weavers, spinners and dyers. The speaker was Tricia Holman talking on the Elizabeth Zimmerman way of knitting - Tricia is Elizabeth Zimmerman's niece so is well qualified to talk on the subject, and indeed was extremely informative and very approachable. She talked about (in hushed voice) cutting your knitting, knitting with different coloured yarns in each hand, and a host of other techniques aimed at speeding things up and making them less complicated - very inspiring.

Then we had a little go at stabilising the edges and then cutting a piece - I'm really up for learning more of this - hopefully a workshop or two next year - I've always wanted to knit with more than one colour at a time, it's so easy in crochet, but I get in a complete pickle with knitting - I have one project that's been hibernating for over 20 years because it became such a nightmare.

If only all weekends could be this much fun.

6 December 2008

QUICKY MITTS

Last weekend I finally got around to making something from the Blue Faced Leicester fibre dyed in the workshop at the Middle Essex Guild a few months ago.


I'd spun it during the week and was really pleased with the two balls of yarn I had. (In the picture the two bigger balls are the two ply ones spun to match - the little ball is the leftover singles - navajo plied)


Needless to say I was itching to get going - I actually started knitting in bed when we went to stay with friends! By the time we left I'd done one cuff.


I just measured my wrist (six inches) did a quick swatch and worked out that with size 10 knitting needles my rib was 61/2 stitches per inch. As I was doing K1P1 rib. and needed and even number. I cast on 38 stitches and worked a couple of inches of rib. I then cast off all bar one stitch.


Next I did 2 chain and then picked up along one edge with a 3.5mm crochet hook - I picked up using double crochet stitches - enough to open it up a bit but not so many as to make the edge of the cuff start to flute.


At the end of the first crochet row I joined with a slip stitch, then again did 2 chain and worked in double (american single) crochet increasing every 2 or 3 stitches over this row, once again joining with a slip stitch. I did the same for the next row by which time I had enough stitches. (basically I just tried it on with every row and had a look to see how much I needed to increase) I now carried on in double crochet until I reached the thumb knuckle.


At this point I changed to crocheting back and forth missing the 5 stitches at the end of the row. I worked like this until I passed the web between thumb and forefinger.


I now made three chain at the end of the row and slip stitched to the other side.


Then I carried on working in the round until the work reached just past my knuckles.


Finally I picked up double crochet stitches around the open square around the thumb and worked in the round decreasing several stitches each row and trying every row for fit.


7 October 2008

GODDESS SCARF

Well now I have full photographic capabilities back I can show you the finished scarf made from the Goddess fibre that I bought way back when it was sort of summer.


I used the Morning Surf pattern that was in Spin-Off. I'm really pleased with it - there was a worried moment when I thought it wasn't going to be long enough but when washed and blocked it turned out just right - they do seem to stretch in the wash (better than felting I s'pose).

28 June 2008

FLEECE TO GARMENT DAY AT GRANGE BARN

Last Saturday the Mid Essex Guild held a fleece to garment day at Grange Barn near Coggeshall - the same event had been held last year and was a great success. It was a cold and miserable morning when I left to make my way there and I had that sinking feeling you get when it's an event open to the public and the weather has turned on you.

Upon arrival it was clear that fewer people were there than at the previous year's event and then Leslie - their Chairman - announced that the Lavenham guild had been called upon by the National Trust to demonstrate at another event so we were a team down as well. The upshot of all this was that a decision was made that due to lack of numbers we wouldn't attempt the scarves that we'd done the previous year - instead we were all to make 9" squares for a project by Oxfam to make a huge patchwork blanket to be sent to the government as a patchwork petition - as a protest against the number of women who die unnecessarily in childbirth every year -


see
http://www.oxfam.org.uk/generationwhy/blog/2008/04/patchwork-protest.html-


These would later be broken up and sold in Oxfam stores to raise money. We were all up for this as it's such a worthy project so off we went in our little teams and started spinning the beautiful dyed fuzz that was available for us - all provided and prepared by one of Mid Essex's members.


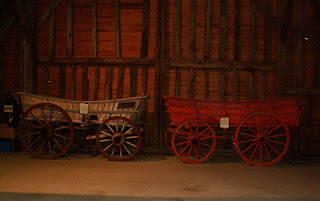
Grange Barn is an amazing building and it has a wonderfully calm atmosphere - it's a great place to spin, especially with like minded people with whom to chat while working. There are a couple of old carts and some weird and wonderful farm equipment as well as various displays about the history of the building and others that are similar.


The day gradually warmed up - the atmosphere was already very warm and welcoming - and as time went on more people arrived - some to join in and some to watch. It was nice to catch up with another guilds news and swap tips and stories. There were some fantastic displays that various members of the Mid Essex Guild had set out Jackie Crook had a table full of luscious samples of all her natural dyeing plus signed copies of her book for sale. Jill Goodwin was there with more naturally dyed samples. There was a truly fabulous selection of hand made items for sale at ridiculous prices - truly made for the love and not the money! I bought my first christmas pressy here - a beautiful little bag made with deliciously soft and silky angora - the fibre was also for sale. I also saw two items of clothing that I WANTED..... a grey angora sweater which turned out to be slightly too small and a wrap around serape thingumy in amazing reds (made by Lesley - see below, also her lovely blue woolly).


photo of serape by Lesley Ottewell


Becky Poynter of http://www.yarnsmith.co.uk/ was there and being very helpful with us novice knitters. Rather fortuitously she had a selection of bamboo knitting needles for sale - which we needed for the squares as they required a different gauge to the scarves that we had been preparing to knit. I actually borrowed Hazel's needles, she then borrowed Hillary's needles and Hillary went and bought some bamboo needles from Becky!

There was also a display from Melford Alpacas - the fleece in the middle of the table was the softest I'd ever felt - I just wanted to make a nest in it! There was quite a selection of yarns and fibres available from super super fine to moderately coarse for felting. We were told that alpaca fibre is non-allergenic which I didn't know previously.

Oh gosh there was lots more to see and so many people to talk to - it's amazing that we got any work done at all. We did though - in our little group only Hilary finished her square - through sheer bloody mindedness - she was still working whilst we were packing up around her! I've almost finished mine - I need to put a border on it as it's not quite 9". There were a few squares handed in towards the end of the day - by the quicker knitters (or maybe they spent less time nattering and more time focusing on the job at hand!) - well done to all those who finished.


It turned out, once again, to be a wonderful day - full of interest and we were made very welcome - bring on next year's fleece to garment day!

17 June 2008

HAPPY FATHERS DAY

A while back I decided that I would like to make my dad a scarf for Fathers Day. I thought about the colours my dad wears and decided that blues and greys would be good colours for him, so that gave me the perfect excuse to scour Etsy for fibre. I chose superwash merino fibre, as I know my mum is unlikely to want to handwash anything (actually Im with her all the way here!). I found two lovely fibres, a blended grey. from theranch.etsy.com


and a space dyed mix of bluey colours from Freyalyn.etsy.com


I spun them on my millefiori drop spindle from butterfly girl designs (also on Etsy) and then Navajo plied them on my Ashford Joy spinning wheel to keep the colours separate.


I particularly enjoyed spinning the blue yarn as it was so lovely to handle and it spun into a beautifully soft yarn. The finished yarn was 12 wraps per inch. The Grey yarn was silkier than the blue and was lovely enough that it almost won me over even though it was grey.


To make the scarf I chose to use a modular knitting technique which shows the colour variations very well and is easy for a dodgy knitter to handle - I learned this technique at a guild meeting earlier this year - it was taught by Rosie Sykes who inspired me so much that I picked up my knitting needles for the first time in years for this project. It uses only knit stitches and no purl which I liked a lot. I knitted 19 squares in the first row using size 5 mm needles then picked up all along one edge and created a grey stripe down the middle, then knitted the next row of blue squares. I finished by adding a grey stripe at either end and then did a single row of crochet as a border.
I washed and pressed it and marvelled at how much softer it was after washing - and breathed a sigh of relief when it didn't shrink or felt and in fact stretched slightly back to the length I'd hoped it would be when I started knitting (scarves always seem to shrink as they're worked I find).

The finished scarf weighed 4.5 oz or 135g and it took 16 hours to spin, ply and wind the balls and 22 hours for me to knit - probably very slow compared to all you super knitters - but hey I did it and got it posted in time for Fathers Day!

25 March 2008

EQUIPMENT - YARN WINDING TOOLS

There are several tools for winding your finished yarn - the first decision to make is whether to wind into a skein or a ball - and this is determined by what you are going to do with it next.

If you want to dye your yarn you will need a skein. If you are planning to knit or crochet your finished yarn you will want a ball - ideally a centre pull ball as this won't then roll all over the place as you work. If you are planning to weave then you might possibly want both a skein and a ball at different stages of the preparation process.

SKEIN WINDING TOOLS

NIDDY NODDY

I just love the name niddy noddy and it is actually quite apt for this tool - when in use it nods up and down as you wind your yarn onto it. It is shaped like a capital "I" except that one of the cross bars is at right angles to the other. Niddy Noddies come in many sizes including a tiny one by Ashford that slots together for use and comes apart for easy carriage - great for portability. There are different sized fixed ones and also adjustable ones for different sizes of skeins - although these can slip when winding once they've had a bit of use.

SWIFTS

There are several designs of swift - they're basically tools that spin around a central shaft and wind a skein. My favoured style of swift is an "umbrella swift" as these are adjustable for different sizes of skeins - and anyway I just love the way they look! With an umbrella swift it is quite easy to measure a length of yarn and then adjust the swift to create that size of skein. They're quite big though and not terribly portable.

BALL WINDING TOOLS

MECHANICAL BALL WINDERS

These come in many designs - the most commonly available are the plastic ones - cheap to buy and do a perfectly adequate job. Occasionally bits fly off mine and I have to put it back together again but all in all it does what I want it to do. It is also possible to buy a variety of hand made wooden ones - which I would imagine are better quality - but come with a substantially higher price tag.

NOSTEPINNE

This is in essence a fat stick turned and marked on which a ball can be wound by hand - I've not used one - indeed I've not actually seen one in the flesh - only in photos. They are very portable, have no mechanical parts to wear or go wrong and can be very beautiful. However I imagine it takes a little longer to wind a ball on one of these by hand than it does on a mechanical ball winder where you just turn a handle - although carefully winding a ball by hand may be quite rewarding in itself.

I would like to add a few photos - but am having a few problems with my computer at the mo' so will add them later - along with some useful links.

15 March 2008

KAFFE FASSETT TALK

Today I went to a talk and slide show by Kaffe Fassett held by the Middle Essex Guild of Weavers, Spinners and Dyers at White Notley (near Braintree). Wow what a day! We had a free pass to the Museum at Braintree for the morning - I would most definitely recommend visiting this museum if you are interested in textiles as there's plenty here to see including quite a lot of information about Courtaulds and Warners. Not far away is the Warners textile archive which I didn't get to today but am told that it's well worth a visit - one for the future then!


The talk began at 2pm and the hall contained - well it must of been over 100 - excitable women eager to hear Kaffe Fassett talk. He provided a slide show which showed some of his inspiration and a lot of his work. He talked about how his ideas come about and proclaimed that it's so easy we could all do it! (If only we all had his special eye for mixing colour). He showed us so many things including latest designs for the Peruvian Connection (oh how I wish I could afford this stuff - beautifully designed and made - wonderful colours - ah well, maybe one far off day in the future!).

If you get a chance to see Kaffe Fassett talk do take the opportunity - he is so inspiring - I am buzzing with ideas for what to do next - watch this space!


He then showed us a selection of his samples and quilts.


After the talk we were able to buy his signed books. I desperately wanted his "Pattern Library" but by the time I got to the front they were all gone - I shall just have to see him again in the future!


If you want to see what Kaffe does visit his website at

http://www.kaffefassett.com/

and you can see his work for the Peruvian Connection at

http://www.peruvianconnection.com/

There were also displays of books published by members of the Middle Essex Guild and many lovely hand spun yarns and beautifully knitted woollies (see pic - I don't know which Middle Essex Guild Member did this but it's really lovely).


All in all a very yummy day indeed!

9 March 2008

SIMPLE SCARF PROJECT


THE PROJECT


This project came about because of a fleece to garment day that was held in a lovely old barn last year. Several guilds took part (the guild that I belong to came 3rd - or second to last!) It was a great day with all sorts going on and I'm really looking forward to taking part again this year. The garment(s) we had to produce were two knitted scarves, knitted end to end - 125 stitches on size 8 needles for 25 rows. The finished scarves had multicoloured lengthways stripes and were extremely pretty - so naturally I thought "I could do that at home" - and, being more of a crocheter than a knittter the natural progression was to crochet my scarf rather than knit it.


FIBRE PREPARATION


The fibre I have used for this project is commercially prepared and dyed Merino tops. I've chosen warm reds and pinks with a little white for highlights. I bought the tops from my fav crafty shop - Handweavers Studio in Walthamstow.


The tops come as tightly wound balls which need to be opened out and then split. To do this I hold the top up and gently peel off a strip from one side (see pic) - if the top is fairly new this will be relatively easy. However if it's been in the bag for a while it may resist a bit.


Once I have my strips ready I then pre-draft them prior to spinning - this just makes it easier to control the thickness of the yarn that's being spun. (If you want to mix colours you can do so quite easily at this stage by pre-drafting two colours together or by pre-drafting two colours separately and then winding them into balls together).


To pre-draft simply hold the yarn in your left hand (if you're right handed) and, with your right hand, pinch between forefinger and thumb and pull gently toward you - just enough to open the fibres up - not so much that they drift apart. The strip you end up with is much longer and thinner and the fibres are very open - this is the key to controlling the fibre during spinning.


I then wind all my pre-drafted wool into loose balls (I used to use "nests" but I find that they snag more, when you're trying to spin, if you move them about too much).


SPINNING


I then spin on my Ashford Joy spinning wheel and ply into a two ply yarn which I like to wind into centre pull balls ready to be crocheted.


I had six colours - two pinks, two warm reds, a deep burgundy and almost white (one ply white and one ply mixed white and red).


For this project I spun a yarn that was about 17 wraps per inch. The finished scarf weighed 75g. This means that it weighs about .4 of a gramme per 10cm square.


CROCHETING THE SCARF


The final phase is to crochet the yarn into a scarf.


For this scarf I used a crochet hook that's around about 3mm (It's an antique bone hook so I can't be exact but this is a reasonable estimate). I crocheted 200 stitches lengthways then, using double crochet (American singles), I randomly changed colour for each row until I'd completed 39 rows. My scarf measures approx 49 inches by 6 inches (125cm x 15cm)


I then washed it in a gentle woollen washing liquid and blocked the scarf to finish - I don't always do this but these scarves tend to go a little curly if you don't also it does give a smarter finish, which I felt was appropriate here.


The yarn weight is unimportant as you can change to an appropriate size of hook for your yarn and then crochet an appropriate number of stitches - this is dependent on the length that you want your scarf to be (I like a shortish scarf that can easily be tucked into the top of whatever woolly I'm wearing - but this isn't to everyone's taste). you can use your own colours and if you're not a spinner you can use commercial yarns - these projects are a great way to use up oddments - you can create scarves with a rainbow of colours and a myriad of touchy, feely textures. So have a go it's simple and can be completed quite quickly.